Tuesday, 6 August 2013

Create Data Entry Page In ADF


1.Create New Application

  1.Application Name:EmployeeForm
  2.Application Package Prefix:dilip.oracle.adf.empform


 2.Create ADF Business Component(Enity Object,ViewObject,Application Module)

  1.Entity Object:

   Name:EmployeesEO

   Package:dilip.oracle.adf.empform.model

   Schema Object :Employees


  Enable Create Method and Remove Method


 Check Generate Default View Object CheckBox

  2.ViewObject:

   Name:EmployeesVO

   package:dilip.oracle.adf.empform.model

  Check Application Module CheckBox

  3.Application Module:

   Name:EmployeeAM

   package:dilip.oracle.adf.empform.model 


6. Create Search Page

Right Click on ViewController -> New -> Web Tier->JSF/Facelet->Page

File Name – Employee

Initial Page Layout and Content – Quick Start Layout

Click on Browse and select One Column Stretched and check Apply Theme


7.Expand Page Implementation and Select Automatically Expose UI Components in a New Managed Bean


8.Drag Decorative Box in Jsf page


9.Select EmployeeVO and Expand the Data Control panel and Drag and drop the EmployeesVO1 to the   page Choose Query -> ADF

Form Panel as shown in Slide. 


10.Add Commit and Create Operations in Page

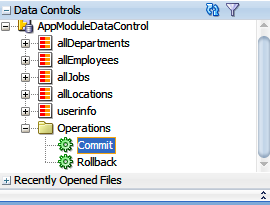
Select DataControls -> DataEntryAMDataControl -> Operations

Drag Commit Operation in page

Similarly Select DataControls > DataEntryAMDataControl > EmployeesVO1 > Operations

Drag Create Operation in page


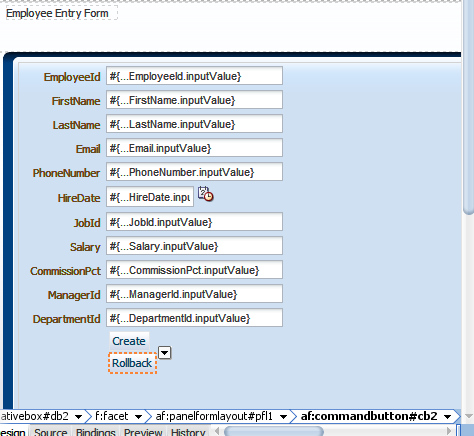
11.Drag ADF button to Page(Create and Commit)


12.Select Commit button and make field Disabled properties to NULL.
     

13. See EmployeeEntry Page Below.


 14.New Record in Database


Monday, 5 August 2013

Search Page in ADF

You can create search page that allow users to enter search criteria into input fields for known attributes of an object.The search criteria can be entered via input text fields or selected from a list of values in a popup list picker or dropdown list box. The entered criteria is constructed into a query to be executed. Named bind variables can be used to supply attribute values during runtime for the query. The results of the query can be displayed as a table, a form, or another UI component as per need.

Search page are based either on view criteria defined in view objects or on implicit view criteria defined by JDeveloper. Search pages are region-based components that are reusable and personalizable. They encapsulate and automate many of the actions and iterator management operations required to perform a query.
 You can create several search forms on the same page without any need to change.

1.Create New Application

  1.Application Name:EmployeeSearch
  2.Application Package Prefix:dilip.oracle.adf.searchEmp


 2.Create ADF Business Component(Enity Object,ViewObject,Application Module)

  1.Entity Object:
 
   Name:EmployeeEO
   Package:dilip.oracle.adf.searchEmp.entities
   Schema Object :Employees


  Enable Create Method and Remove Method


 Check Generate Default View Object CheckBox
  2.ViewObject:
   Name:EmployeeVO
   package:dilip.oracle.adf.searchEmp.service 


  Check Application Module CheckBox
  3.Application Module:
   Name:EmployeeAM
   package:dilip.oracle.adf.searchEmp.queries


3.Define Bind Variable:

   Double Click on EmployeeVO in Model  go to query page

   Expand the Bind variable accordion and click on Green button

   Bind Variable name and type as following make sure required check box is un-checked

   Name – empno

   Type -- Number


4. Create Named View Criteria

 Double Click on EmployeeVO in Model  go to query page. Expand the View Criteria accordion
  and  click on Green button


View Criteria is actually conditions on VOs which you usually define decoratively

     1.Expand the View Critieria Section in EmployeeVO page and click the Green plus sign

     2.Give a proper name to your View Criteria

       Criteria Name -> EmployeesVOCriteria

     3.Click on Add Item  Click the ( ) group press Add item and select values as sown in slide make sure
       you have selected the   bind    variable empno

          Attribute – Employee_id

          Operator – Equals

          Operand – Bind Variable

          Parameter – empno

          Un-check Ignore Case and Check Ignore Null Values


6. Create Search Page

Right Click on ViewController -> New -> Web Tier->JSF/Facelet->Page

File Name – EmpSearch

Initial Page Layout and Content – Quick Start Layout

Click on Browse and select One Column Stretched and check Apply Theme


7.Expand Page Implementation and Select Automatically Expose UI Components in a New Managed Bean

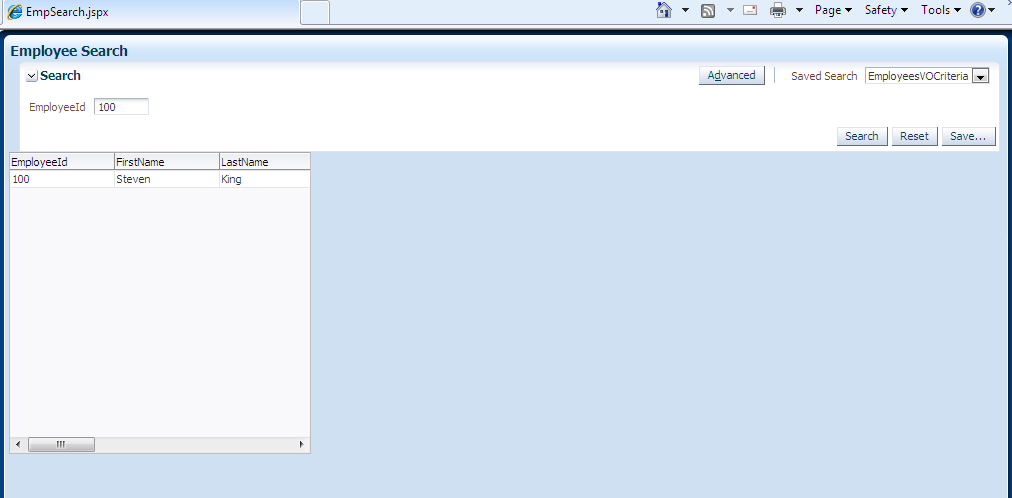
Select EmployeeVO and Expand the Data Control panel and Drag and drop the Named View Critieria “EmployeesVOCriteria” to the page Choose Query -> ADF Query Panel with Table as shown in Slide.


8.Change Search Header from "EmployeeEO" to Employee Search
   Change Text Property Search Employee.Also see resulted Search Page.


Sunday, 4 August 2013

Hello World In ADF

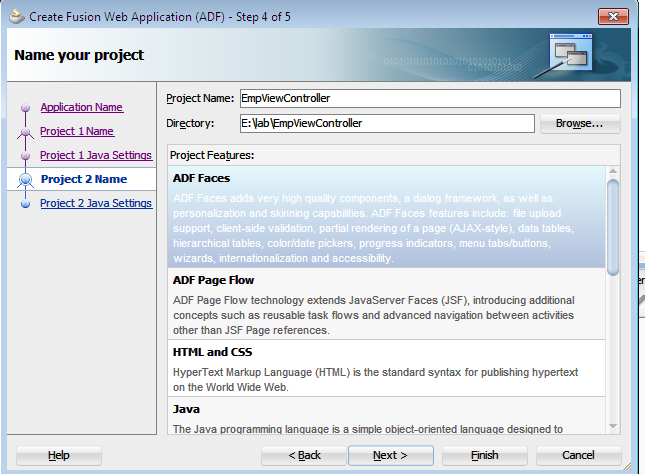
1. Create a New Application
    New > Applications > Fusion Web Application (ADF).


2. Application Name: HelloWorld
    Application Package Prefix:dilip.oracle.adf.hello


3.Select ADF Business Component.


4.Select ADF faces.

5.Select jsf/facelets-->Page from webTier


6.File Name –  HelloWorld.jspx
  Check “Create XML Document (*.jspx)”
  Select “Blank Page” in “Initial Page Layout and Content” Section


 7. Drag Decorative Box from Layout option available in Component Palate


8.Drag item of type “Input Text”, “Button” on the center facet of decorativeBox from Common Components Section.
           Set Label Property :Enter Here 
       

9.Drag item of type Output Text”, “Button” on the Top facet of decorativeBox from Common Components Section.
            Delete OutpuText1 in the value field property from Common Components.

10.Drag Command Button on Center Face.
        Set Text Property to :Go.   

11. Select TOP “af:decorativeBox” then go to Property Pallete and Double Click “Panel Group Layout” in “Layout” Section
Halign -- center


12.Select Center  “af:decorativeBox” then go to Property Pallete and Double Click “Panel Group Layout” in “Layout” Section
Halign -- center


13. Set Bind Action Property for commandButton.

   Double Click on commandButton that will open set Bind Action Property window as shown below.


Click Ok and then Write Following Code in cb1_action() which you have just created(in HelloWorld.java)


        RichInputText inputText = getIt1(); 
            String name = "Hello "+(String)inputText.getValue()+ "!";
            System.out.println("This Is Entered "+name);
            ot1.setValue(name);

14. See HelloWorld Result Page:


E-Business Suite Application Development using OAF and ADF

OAF and ADF

OAF means OAF R12 (OAF packaged with E-Business Suite R12) and ADF means ADF 10g or 11g.

OAF is a model-view-controller technology  is fully oriented towards EBusiness
Suite application development.  OAF  is comprised of underlying technologies like UIX and BC4J, that respectively form the core of the view and model layers. It includes Application Object Library (AOL) that provides common E-Business Suite artifacts such as menus, functions, messages, profiles,flexfields and attachments, and common services like function and data security. MDS is used for metadata management.

 
                                                               Fig: OAF Architecture


ADF is a comprehensive, model-view-controller technology stack that is oriented
towards general-purpose application development.ADF allows users to select among several choices of UI and business services technologies (ADF Faces,ADF model, ADF BC,JSF,JSPX).


Fig:ADF Architecture 

Recommendation of  OAF and ADF.

 1. If you want to integrate your extensions tightly with the E-Business Suite,you should use the OAF
     Release 12 technology which includes the use of JDeveloper 10g.


2. If you are building a separate application that does not integrate tightly with the E-Business Suite, but
    needs E-Business Suite-specific capabilities like Flexfields and personalization, you should use the OAF
    Release 12 technology. If your application does not need to integrate with the E-Business Suite, or
    doesn't require any of the E-Business Suite-specific capabilities like AOL, you should use 
    ADF 10g with SOA based integration with E-Business Suite.


3. If you are building a separate application that does not need to integrate at all with the E-Business Suite,
    and you need an AJAX-style rich client user interface, you should use ADF 11g.


Thursday, 1 August 2013

Number Formatting in OAF

     I want to do Number Formatting to Amount Field.

     //In PR After super.processRequest Paste Below code and give proper //ViewAttributeName

        OAApplicationModule am = pageContext.getApplicationModule(webBean);
        Formatter formatter = new OADecimalValidater("#,##0.00","#,##0.00");
        OAMessageStyledTextBean originalamtBean =
        (OAMessageStyledTextBean)webBean.findChildRecursive("Amount");
        if(originalamtBean != null)
            originalamtBean.setAttributeValue(ON_SUBMIT_VALIDATER_ATTR, formatter);
          
        OAMessageStyledTextBean OntremainamountBean =
       (OAMessageStyledTextBean)webBean.findChildRecursive("Amount");
        if(OntremainamountBean != null)
            OntremainamountBean.setAttributeValue(ON_SUBMIT_VALIDATER_ATTR, formatter);  

Hide/Show in OAF

This Example will show you how to implement the hide show region style. You can Hide or Show your Result data as per your need. So this can be achieved by changing the style of the region to Hide Show.


    Hide/Show can be implemented into a page design in the following ways.
 
    1 Hide/Show in Page Content
    2 Hide/Show in a Table Row
    3 Hide/Show in a Table Cell
    4 Hide/Show in Side Navigation
    5 Hide/Show Headers


      Here we are adding Hide Show Region on Result Table of Employee Search Page

Step 1: Select QueryRN of EmplyeeSearchPage and add Hide/Show component, create region and set
              its  style to hideShow.
             a) ResultHideShowRN


Step 2: Set the following properties for the hideShow region ResulthideShowRN:

         a) Disclosed Text - the text to display when the content is disclosed. If you fail to specify this property
             the OA Framework displays "Hide" as the default value.
            
            i.e Hide Employee Data  
           
         b) Undisclosed Text - the text to display when the content is hidden. If you fail to specify this property
             the OA Framework displays "Show" as the default value.

            i.e Show Employee Data

            
Step 3:   Drag ResultsTable in ResultHideShowRN.
              

Step 4: Initially Disclosed - controls whether the supplemental content is shown when the page first renders


            in the session. The default value is "False."


    See Resulted Page Below: