You can create search page that allow users to enter search criteria into input fields for known attributes of an object.The search criteria can be entered via input text fields or selected from a list of values in a popup list picker or dropdown list box. The entered criteria is constructed into a query to be executed. Named bind variables can be used to supply attribute values during runtime for the query. The results of the query can be displayed as a table, a form, or another UI component as per need.
Search page are based either on view criteria defined in view objects or on implicit view criteria defined by JDeveloper. Search pages are region-based components that are reusable and personalizable. They encapsulate and automate many of the actions and iterator management operations required to perform a query.
You can create several search forms on the same page without any need to change.
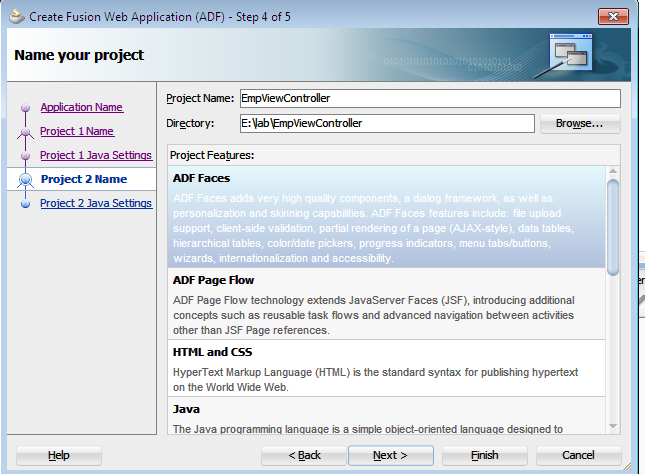
1.Create New Application
1.Application Name:EmployeeSearch
2.Application Package Prefix:dilip.oracle.adf.searchEmp
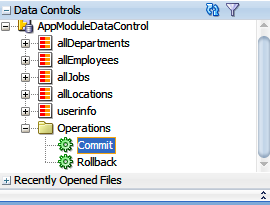
2.Create ADF Business Component(Enity Object,ViewObject,Application Module)
1.Entity Object:
Name:EmployeeEO
Package:dilip.oracle.adf.searchEmp.entities
Schema Object :Employees
Enable Create Method and Remove Method
Check Generate Default View Object CheckBox
2.ViewObject:
Name:EmployeeVO
package:dilip.oracle.adf.searchEmp.service
Check Application Module CheckBox
3.Application Module:
Name:EmployeeAM
package:dilip.oracle.adf.searchEmp.queries
3.Define Bind Variable:
Double Click on EmployeeVO in Model go to query page
Expand the Bind variable accordion and click on Green button
Bind Variable name and type as following make sure required check box is un-checked
Name – empno
Type -- Number
4. Create Named View Criteria
Double Click on EmployeeVO in Model go to query page. Expand the View Criteria accordion
and click on Green button
View Criteria is actually conditions on VOs which you usually define decoratively
1.Expand the View Critieria Section in EmployeeVO page and click the Green plus sign
2.Give a proper name to your View Criteria
Criteria Name -> EmployeesVOCriteria
3.Click on Add Item Click the ( ) group press Add item and select values as sown in slide make sure
you have selected the bind variable empno
Attribute – Employee_id
Operator – Equals
Operand – Bind Variable
Parameter – empno
Un-check Ignore Case and Check Ignore Null Values
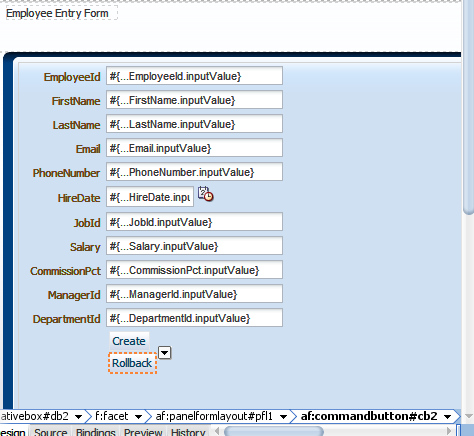
6. Create Search Page
Right Click on ViewController -> New -> Web Tier->JSF/Facelet->Page
File Name – EmpSearch
Initial Page Layout and Content – Quick Start Layout
Click on Browse and select One Column Stretched and check Apply Theme
7.Expand Page Implementation and Select Automatically Expose UI Components in a New Managed Bean
Select EmployeeVO and Expand the Data Control panel and Drag and drop the Named View Critieria “EmployeesVOCriteria” to the page Choose Query -> ADF Query Panel with Table as shown in Slide.
8.Change Search Header from "EmployeeEO" to Employee Search
Change Text Property Search Employee.Also see resulted Search Page.


